1.Before logging in the software, please make sure the network connection is available.
2.One account can’t be used on multiple computers at the same time.
3.Please ensure that you won’t be offline for more than 7 consecutive days while the lending code is registered on your computer. Otherwise, the registration will become invalid automatically and you will be required rebinding the code.
You can skip this step if you already have a Glodon account.
When using Cubicost software for the first time, you will receive an email with your account and original password. You can click ‘Modify Password’ to change the password.
If you didn’t receive the activation email, please check the Spam in your email box.

Figure 1: Activation Email
Step 1: After the administrator assigns product permissions to a user. The user will receive an email. In this email he can find which products he can use and the link for downloading Cubicost Manager. He can click the link to download the manager first.
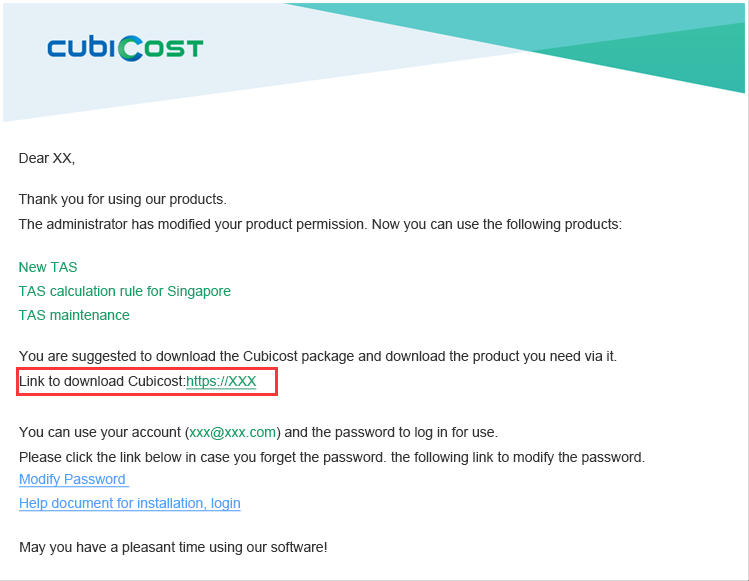
Figure 2: Email with Product Permission Info
Step 2: After downloading Cubicost Manager, double click the icon below to install it.
Figure 3: Cubicost Manager Installer
Step 1: Agree to the Glodon License Agreement and click “Install Now”.

Figure 4: Agree to Glodon License Agreement
Step 2: Select the software installation directory and click “Next”.

Figure 5: Software Installation Directory
Step 3: Click “Finish” to finish the operation.
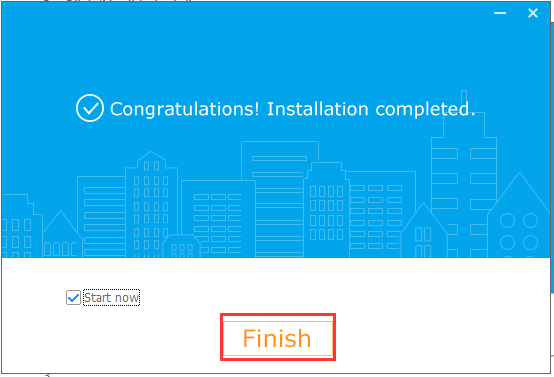
Figure 6: Finish Installation
Step 1: After installing Cubicost Manager, open it and then the download interface. Find the product you need and click ‘install’ to install it.
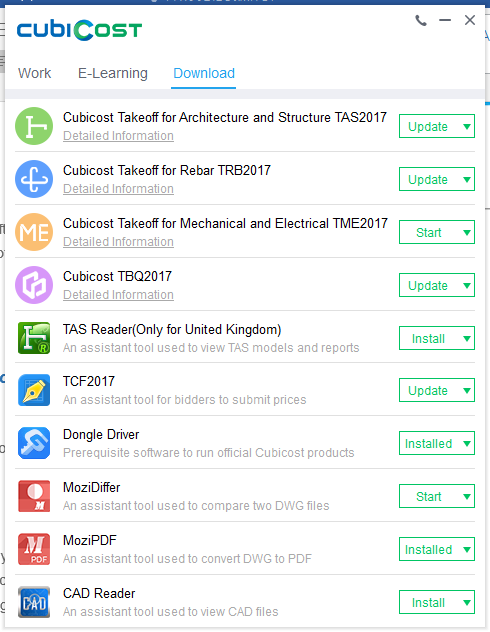
Figure 7: Download Interface in Cubicost Manager
Step 2: Agree to the Glodon License Agreement and click’ Install Now’.

Figure 8: Agree to the Glodon License Agreement
Step 3: Select your License Type. You are recommended to select the first option, “Cloud License”. Click “Next” to continue.
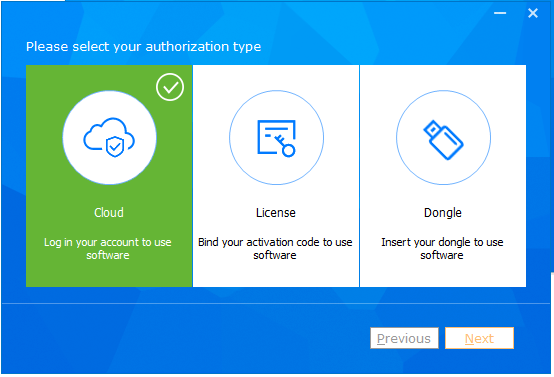
Figure 9: License Type
Step 4: Select the software installation directory and calculation rules you need. Click ‘Next’ to continue.
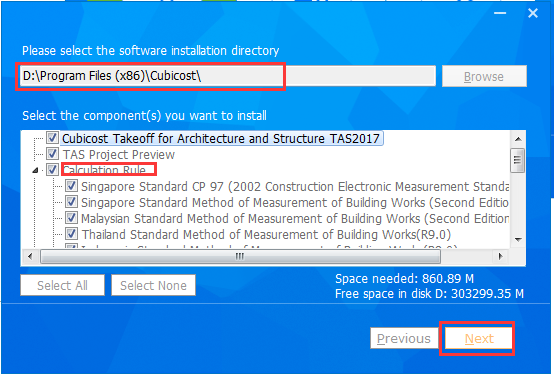
Figure 10: Product Installation Directory & Calculation Rule
Step 5: Agree to “Customer Experience Improvement Program” and click “Next” to start installation.
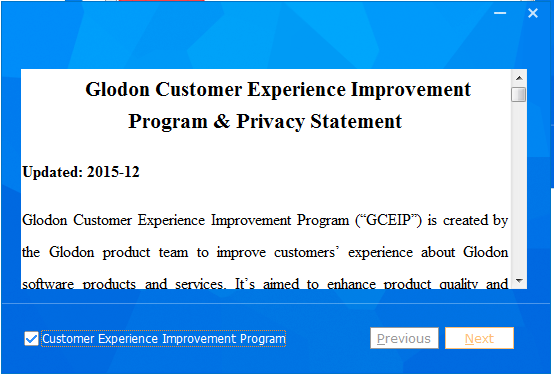
Figure 11: Customer Experience Improvement Program
Step 6: Click ‘Finish’ to finish installation.
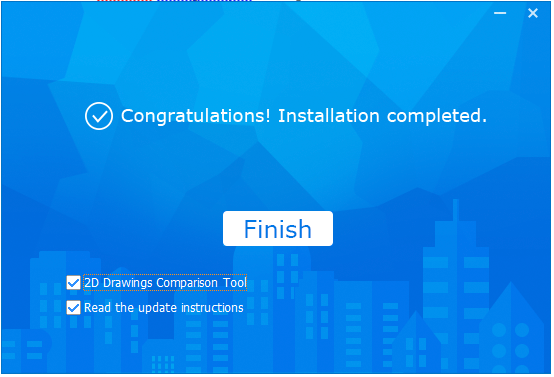
Figure 12: Finish Install
If your computer is connected to a network, please double click the desktop icon to open the software. Then input your Glodon account and password to log in it.

Figure13: Login Interface-TAS,TRB,TME
Step 1: After installing the ‘Server Management for TBQ’ program on the server computer, click ‘Install’ to install the TBQ server.
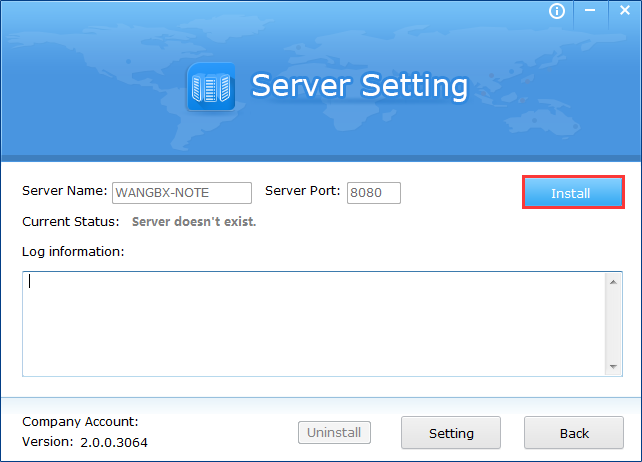
Figure14: Install TBQ server
Step 2: After ‘Install’, click ‘Start’ to start the server.
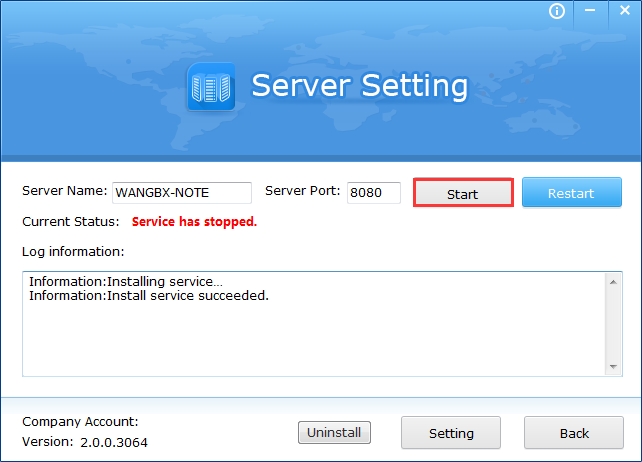
Figure15: Start TBQ server
Step 3: Bind with your company account in the pop-up window.
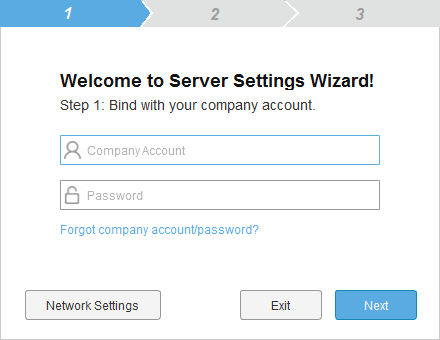
Figure16: Bind company account
Step 4: Select the administrator. The administrator is the one who has the right to manage all the projects.

Figure17: Select administrator
Step 5: Please match the new and original accounts to get permissions for all projects in your original account automatically. Otherwise, you have to reset them manually. If you use this software for the first time, you won’t see this interface.
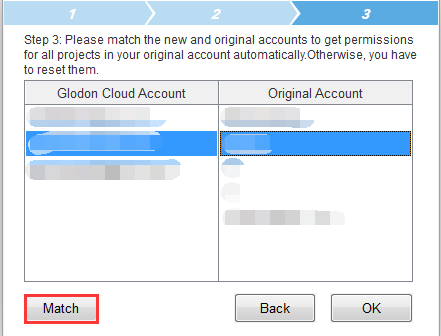
Figure18: Match the new and original account
Step 6: After matching accounts, you can click ‘OK’ to finish starting the server.
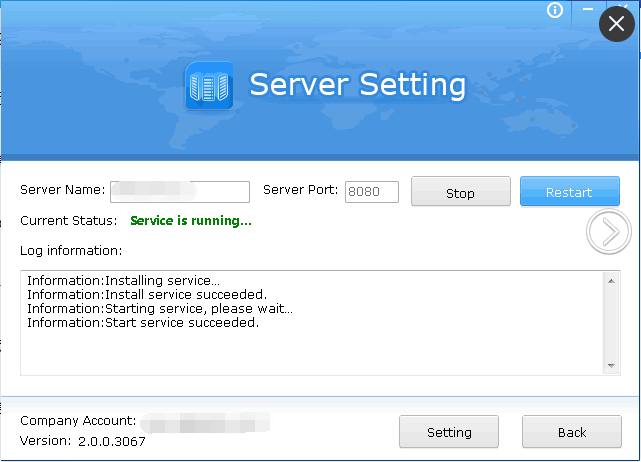
Figure19: Successfully started the service
Note: If you want to change your server, you need to unbind your company account from your current server first and then bind it to another server.
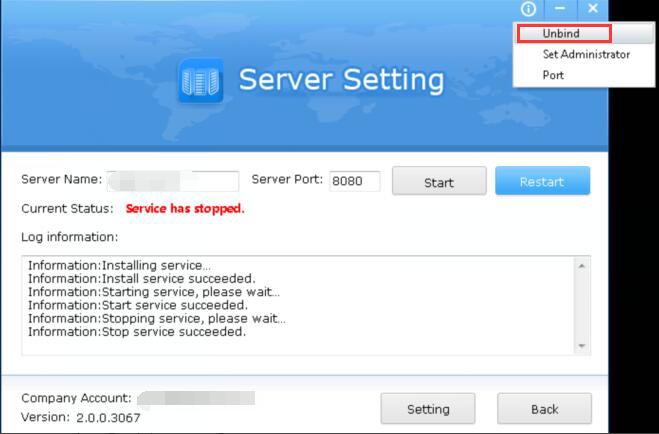
Figure20: Unbind service
Step7: Log in TBQ software
After starting the server, you can double click the TBQ icon on your own PC to open the software. Then, enter your Glodon account, password and server IP to log in it.
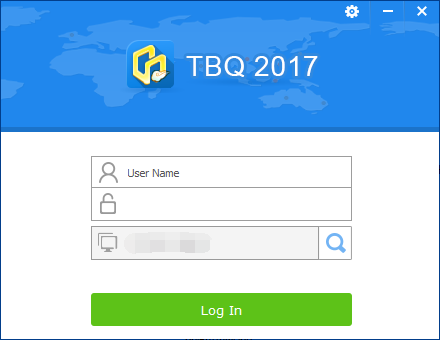
Figure21: Log in TBQ software
Step 1: Install the ‘TBQ Server’ program on your server computer and bind with your company account.

Figure22: Bind company account in server
Step 2: Select the administrator. The administrator is the one who has the right to manage all the projects.
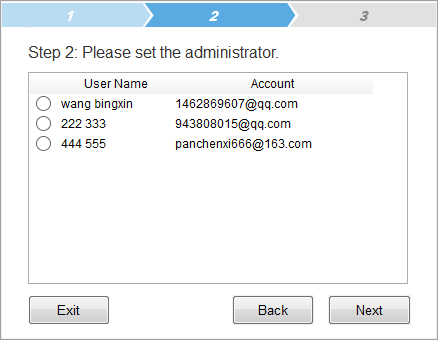
Figure23: Select administrator
Step 3: Start the Server
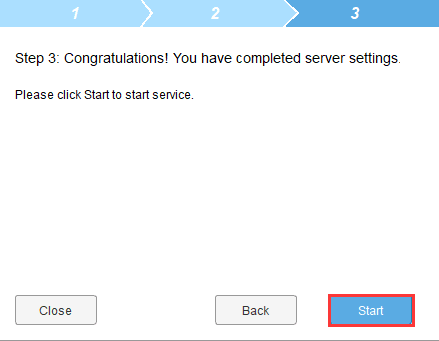
Figure24: Finish Server Setting
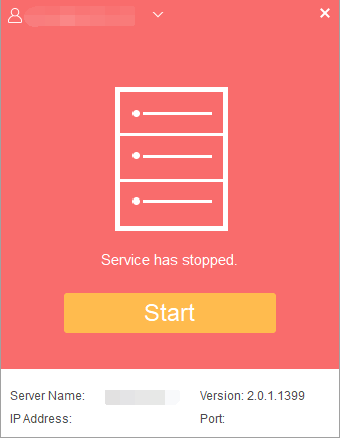
Figure25: Start Server
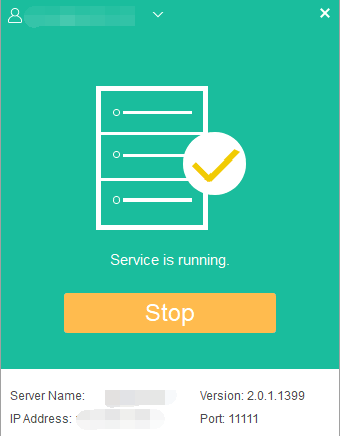
Figure26: Successfully started the service
Note: If you want to change your server, you need to unbind your company account from your current server first and then bind it to another server.
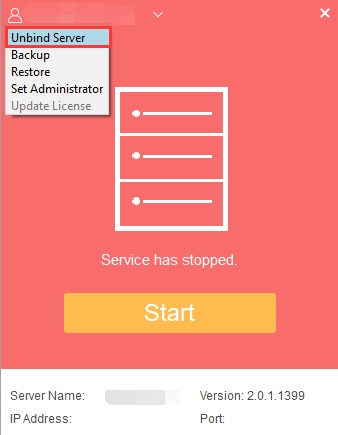
Figure27: Unbind server
Step 4: Log in TBQ software.
After start the server, you can double click the TBQ icon on your own PC to open the software. Then, enter your Glodon account, password and server IP to log in it.
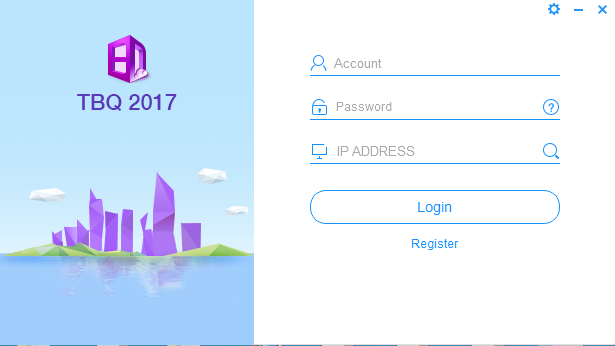
Figure28: Log in interface-TBQ
If your company uses a local area network (LAN), you need to set up the proxy before logging in the software.
Click the button on the right top of the login interface, you will see the Network Settings interface.

Figure 29: Button for Network Settings
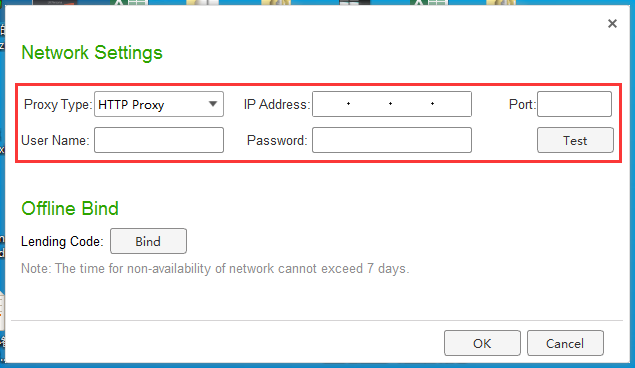
Figure 30: Interface for Network Settings
To use our software offline, you can apply to the administrator for a lending code.
Note: TBQ software can’t be used offline in the cloud authorization mode.
Step 1: Click the button for “Settings" in the shape of a gear at the right top of the login interface and "Bind" in the pop-up window to open the Certificate License Management interface as shown below.

Figure 31: Offline Bind
Step 2: Enter your email address and the activation code i.e. your lending code in the pop-up window, then click Register.
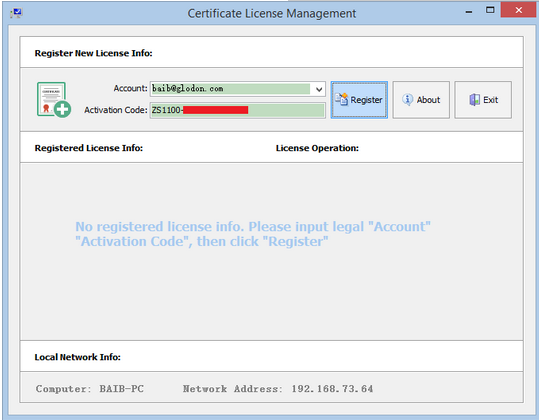
Figure 32: Interface for Certificate License Management
Step 3: After the registration is completed, click Products button to view the assigned products.
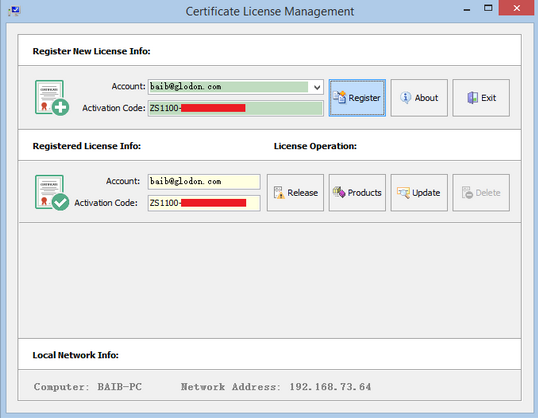
Figure 33: Successful Registration
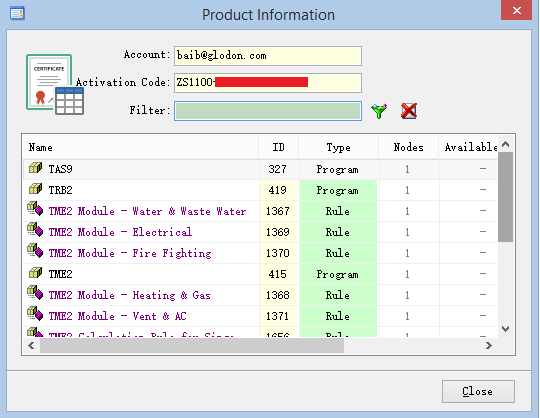
Figure 34: Check products
After binding the lending code, the user can use software offline.
When you return to a network environment, you need to release the lending code. You can open the Cubicost Manager software, right click the Cubicost Manager icon at the bottom right corner of your computer desktop. Click 'License Manager' to pop out the certificate license management interface. Then you can click ‘Release’ to release the code.
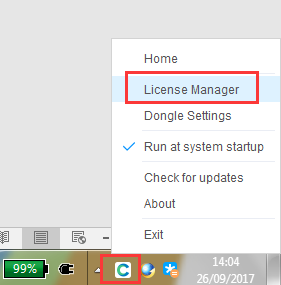
Figure 35: License Manager
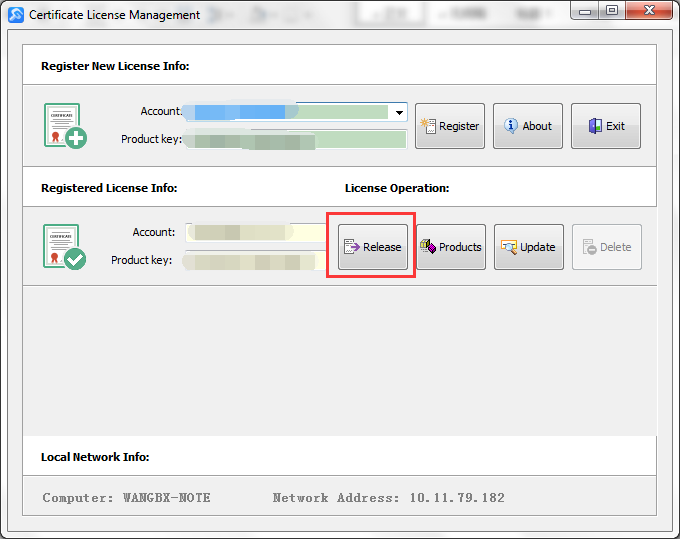
Figure 36: Release code